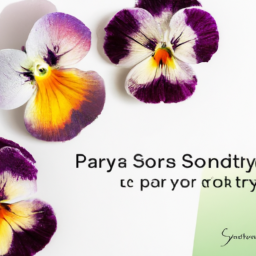
In this article, you will discover the art of creating a beautiful handmade greeting card using pressed pansies. Delicate and vibrant, pressed flowers add a touch of nature and elegance to any card. With a few simple steps, you can create a unique and personalized card that will be cherished by your loved ones. Whether you’re a seasoned crafter or new to the world of DIY, this project is perfect for anyone looking to add a special touch to their greeting cards. So, grab your materials and let your creativity blossom as we explore the art of creating a card with pressed flowers!

Understanding the Art of Flower Pressing
Flower pressing is a timeless and beautiful craft that allows you to preserve the natural beauty of flowers for years to come. Whether you are a seasoned artist or a beginner looking to explore a new hobby, understanding the art of flower pressing is key to creating stunning pressed flower projects. From the history of flower pressing to the various methods and techniques, this comprehensive guide will take you through everything you need to know to create a handmade greeting card using pansies.
History of Flower Pressing
The art of flower pressing dates back centuries, with its origins rooted in ancient civilizations such as Egypt and China. In these early cultures, dried flowers were used for religious ceremonies, medicinal purposes, and even as offerings for the deceased. The practice of pressing flowers then spread to Europe during the Victorian era, where it became a popular pastime among the upper classes.
Importance of Flower Pressing
Flower pressing allows us to capture the fleeting beauty of flowers and preserve it indefinitely. Not only does it provide us with a means of creating unique and personalized crafts, but it also serves as a way to connect with nature and express our creativity. Pressed flower art has a timeless quality that can bring joy and delight to both the creator and the recipient.
Various Methods of Flower Pressing
There are several methods of flower pressing, each with its own merits and suitability for different types of flowers. The most common methods include using a flower press, pressing between heavy books, and utilizing a microwave or iron for quicker results. Each method requires different materials and techniques, so it is important to choose the one that best suits your needs and preferences.
Curating Pansies for Pressing
Pansies, with their vibrant colors and delicate appearance, are perfect for pressing and adding to handmade greeting cards. However, before you can start pressing your pansies, it is essential to curate and prepare them properly.
Right Time for Harvesting Pansies
The best time to harvest pansies for pressing is in the morning when the dew has dried but before the sun is at its peak. Choosing pansies that are fully bloomed but not past their prime ensures that you capture their maximum beauty and vitality.
Choosing Healthy Pansies
Selecting healthy pansies is crucial for successful pressing. Look for pansies with vibrant colors, firm petals, and no signs of wilting or disease. Avoid using pansies that have browning petals or spots, as these may not press well and could affect the overall appearance of your pressed flower card.
How to Cut Pansies for Pressing
When cutting pansies for pressing, use sharp and clean scissors or pruning shears. Cut the stems of the pansies close to the base, leaving enough length to work with when arranging them in the press. Aim to cut the pansies at an angle to enhance their visual appeal.
Detailed Step by Step Process to Press Pansies
Pressing pansies requires precision and care to ensure the best results. By following these step-by-step instructions, you can achieve beautifully pressed pansies for your handmade greeting card.
Cleaning Pansies
Before pressing, gently clean the pansies to remove any dirt or debris. Fill a bowl with room temperature water and dip each pansy gently, one at a time. Be careful not to submerge them fully, as this can cause the delicate petals to become waterlogged. Shake off any excess water and carefully pat them dry using a soft cloth or paper towel.
Arranging Pansies in a Press
Prepare your flower press by placing a layer of absorbent paper or cardboard on the bottom, followed by a layer of blotting paper or any other porous material. Arrange the cleaned pansies on the blotting paper, making sure to leave some space between each flower and not to overlap them. Repeat the process for each layer of pansies, alternating between blotting paper and pansies until the press is full.
How Long to Press Pansies
The duration for pressing pansies depends on the method you choose and the thickness of the petals. Generally, pansies need to be pressed for at least one to two weeks to ensure they are fully dried and ready for use. However, the pressing time may vary depending on the moisture content of the pansies and the environmental conditions. It is essential to check the progress regularly and adjust the duration accordingly.
How to Handle and Store Pressed Pansies
Once your pansies are fully pressed and dried, proper handling and storage are crucial to their preservation and longevity.
Gently Removing Pressed Pansies
To remove the pressed pansies from the press, carefully open the press and lift each layer, taking care not to damage the delicate petals. Use tweezers or a soft brush to gently lift the pansies from the blotting paper. It is important to handle them with care to avoid any tears or damage.
Conditions for Preserving Pressed Pansies
Pressed pansies are susceptible to humidity and sunlight, which can cause them to fade and deteriorate over time. It is important to store them in a cool, dry place away from direct sunlight to maintain their colors and integrity. Consider using acid-free archival paper or specialized acid-free folders to protect the pressed pansies from moisture and environmental elements.
Best Ways to Store Pressed Pansies
To store your pressed pansies, you can use various methods depending on your preference and the size of the pansies. You can place them between acid-free tissue paper and secure them in an acid-free envelope or store them in a dedicated pressed flower album with protective sleeves. Another option is to frame them under glass, ensuring they are pressed flat and protected from dust and moisture.

Choosing the Right Supplies for a Handmade Card
Creating a handmade greeting card with pressed pansies requires the right supplies to ensure a professional and visually appealing result. Consider the following factors when selecting the supplies for your pressed flower card.
Ideal Types of Paper for Greeting Cards
When it comes to choosing the paper for your greeting card, opt for a high-quality cardstock or watercolor paper that is sturdy and can withstand the weight of the pressed pansies. These types of paper provide a smooth surface for adhering the pansies and prevent any potential warping or tearing.
Considerations when Buying Glue and Scissors
Using the right adhesive is crucial for attaching the pressed pansies to the paper without causing any damage or residue. Look for acid-free glue or adhesive dots that are specifically designed for delicate crafts. Additionally, invest in a pair of sharp, precision scissors or mini-pruning shears that can cleanly cut the stems of the pansies.
Decorative Items You May Need
To enhance the visual appeal of your pressed flower card, consider incorporating additional decorative items. This can include ribbon or lace for borders, small embellishments such as beads or sequins, and colored markers or pens for adding text or details. These decorative elements can complement the delicate beauty of the pressed pansies and personalize your greeting card.
Designing and Planning Your Layout
Designing the layout of your handmade greeting card is a creative and exciting process. Consider the following aspects to create a visually appealing and well-composed card.
Determining the Size and Shape of the Card
The size and shape of your card depend on your personal preference and the intended purpose of the card. Traditional rectangular cards are a popular choice, but you can also explore different shapes such as square or circular cards for a unique touch. Consider the size of the pressed pansies and the amount of space you need for other design elements when deciding on the card dimensions.
Composition of Pansies on the Card
When arranging the pressed pansies on the card, aim for a visually pleasing composition. Place the pansies strategically, considering aspects such as color harmony, balance, and focal points. Experiment with different arrangements before adhering the pansies to find the layout that best showcases their natural beauty.
Adding Text and Other Design Elements
To personalize your greeting card, consider adding text or other design elements. Choose a complementary font and color that enhances the overall aesthetic of the card. You can include a heartfelt message, a quote, or even a simple “Thank you” to accompany the pressed pansies. Additionally, incorporate other design elements such as borders, frames, or illustrations to further enhance the visual appeal of the card.

Assembling the Handmade Greeting Card
Assembling the handmade greeting card requires careful attention to detail and precision to bring your design to life. Follow these steps to ensure a smooth and professional assembly process.
Process for Attaching Pressed Pansies
Using a small amount of acid-free glue or adhesive dots, carefully attach the pressed pansies to the chosen paper surface. Start with the larger pansies and work your way towards the smaller ones, ensuring that they are evenly spaced and centered on the card. Gently press down on each pansy to secure it in place without damaging the delicate petals.
Designing with Additional Decorative Items
If you have chosen to incorporate additional decorative items, such as ribbon or beads, now is the time to add them to your card. Consider how these elements can enhance the overall design and complement the pressed pansies. Be mindful not to overpower the delicate beauty of the flowers, but rather use these decorative items to accentuate and highlight their natural elegance.
Adding a Personal Message
After attaching the pressed pansies and any additional decorative items, it’s time to add a personal message to complete your greeting card. Using a fine-tip marker or pen, carefully write your message, ensuring proper spacing and legibility. Consider the font size and style that best suits the overall aesthetic of the card and enhances the sentiment you wish to convey.
Finishing the Handmade Card
To ensure your handmade greeting card is protected and can be enjoyed for years to come, it is important to apply a protective coating and thoroughly inspect the completed card.
How to Add a Protective Coating
To protect your handmade greeting card and preserve the pressed pansies, apply a thin, even layer of clear acrylic sealant or spray varnish. This coating will provide a barrier against moisture, dust, and other environmental elements that could potentially damage the delicate flowers. Be sure to follow the instructions on the sealant or varnish for proper application and allow sufficient drying time before handling the card.
Final Inspection of the Completed Card
Before presenting your handmade card, take a moment to conduct a final inspection. Check for any loose or unevenly attached pansies and secure them in place if necessary. Examine the card for any smudges, smears, or imperfections in the design or text. By conducting a thorough inspection, you can ensure a flawless finished product that is ready to be shared and cherished.

Techniques for Pressed Pansies Card Variations
While using pressed pansies as the focal point of your handmade greeting card is stunning on its own, there are several techniques you can explore to create unique and visually captivating card variations.
Using Different Colors and Shapes of Pansies
Experiment with different colors and shapes of pansies to add variety and dimension to your pressed flower card. Consider using a color scheme that complements the recipient’s preferences or the occasion for which the card is intended. By incorporating pansies with varying petal shapes and colors, you can create visually dynamic and interesting compositions.
Experimenting with Other Pressed Flowers
While pansies make a captivating choice for pressed flower cards, do not limit yourself to just one type of flower. Explore other varieties of pressed flowers, such as daisies, roses, or violets, to bring a diverse and captivating element to your creations. By combining different types of pressed flowers, you can unleash your creativity and create unique designs that stand out.
Incorporating Different Design Elements
To further enhance your pressed pansy cards, consider incorporating different design elements into your compositions. Explore the use of background patterns, embossed textures, or even layered paper cutouts to add depth and interest to your cards. By mixing and matching design elements, you can create truly one-of-a-kind pressed flower cards that reflect your personal artistic style.
Presenting and Preserving Your Handmade Card
Once your handmade card is complete, it’s time to consider its presentation and long-term preservation. Taking care in how you package, store, and display your card can enhance its presentation and ensure its longevity.
Packing Your Card for A Beautiful Presentation
To present your handmade card in a beautiful and thoughtful way, consider using a matching envelope or a decorative gift box. Ensure that the card is centered and positioned neatly within the packaging to showcase the pressed pansies effectively. Adding a decorative ribbon or bow can also elevate the overall presentation and make it feel like a truly special gift.
How to Care for and Store Your Card
To preserve your handmade card and pressed pansies, be mindful of how you store them. Ideally, keep the card in a cool, dry place away from direct sunlight, humidity, and excessive heat. Consider placing it inside a protective sleeve or an acid-free envelope to prevent any potential damage. Regularly inspect the card for any signs of deterioration or fading, and take appropriate measures if necessary.
Advice on Displaying Pressed Flower Cards
If you wish to display your pressed flower card as a work of art, there are several ways you can showcase its beauty. Place it in a frame with UV-protective glass to prevent fading and hang it on a wall to add a touch of natural elegance to your home. Alternatively, consider using a tabletop easel or a display case to exhibit your pressed flower card as a standalone decorative piece.
In conclusion, creating a handmade greeting card using pansies and pressed flowers is a rewarding and visually enchanting craft. By understanding the art of flower pressing, curating the finest pansies, mastering the step-by-step process of pressing, and skillfully assembling the card, you can create a gift that will be cherished for years to come. Whether you choose to use pansies exclusively or incorporate a variety of pressed flowers, the possibilities for creativity are endless. Remember to handle and store your pressed pansies with care, choose the right supplies for your card, and explore different design techniques to make your card truly unique. With proper presentation and preservation, your handmade card will be a timeless treasure that captures the beauty of nature.