If you’re a nature lover who enjoys preserving the beauty of flowers, then this article is for you. In just a few simple steps, you can create your very own flower press, allowing you to capture the vibrant colors and delicate details of your favorite blooms. With materials that can be found around your home, this DIY project is not only a fun and creative way to spend an afternoon, but it also provides you with a unique way to preserve your special memories with nature’s beautiful creations. Let’s dive in and learn how to make your own flower press!
Understanding the Purpose of a Flower Press
What is a flower press?
A flower press is a simple tool used to preserve the beauty of flowers by pressing and drying them. It typically consists of two flat wooden or cardboard boards held together with screws or hinges, creating a tight holding space for the flowers and allowing them to dry without losing their shape or color.
Why do people use flower presses?
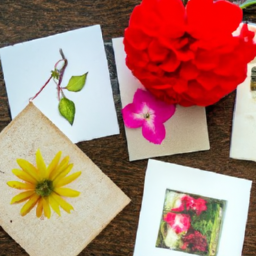
People use flower presses for various reasons, primarily to preserve flowers for decorative or sentimental purposes. Pressed flowers can be used in various crafts such as creating artwork, scrapbooking, making greeting cards, or even decorating home decor items like candle holders and picture frames. Additionally, pressed flowers allow gardeners and flower enthusiasts to preserve the beauty of their garden blooms year-round, capturing a moment in time and immortalizing it.
Popular uses of pressed flowers
Pressed flowers have a wide range of applications in arts and crafts. They can be used to create beautiful floral arrangements, decorate invitations and stationary, enhance the aesthetic appeal of homemade candles or soaps, and even add a unique touch to jewelry designs. Pressed flowers can also be used as a decorative element in framed artwork or as embellishments in scrapbooks and journals. The possibilities are endless when it comes to incorporating the delicate beauty of pressed flowers into creative projects.
Different Types of Flower Presses
Traditional screw press
One of the most common types of flower presses is the traditional screw press. It consists of two wooden boards with holes in each corner. The flowers are placed between layers of cardboard or blotting paper and then inserted into the press. The screws are tightened to create pressure, which helps in pressing and drying the flowers evenly.
Microwave flower press
A more modern and time-efficient alternative to the traditional screw press is the microwave flower press. This type of press utilizes a microwave-safe container and specific materials that allow for rapid drying of the flowers. It typically consists of multiple layers of cardboard or blotting paper, with the flowers sandwiched in between and microwave-safe weights on top. The microwave quickly evaporates the moisture from the flowers, reducing the drying time significantly.
Book method
Another simple and accessible method of pressing flowers is using the book method. This method involves placing the flowers between the pages of a heavy book, usually one with thick, absorbent pages. The weight of the book helps press the flowers flat while the pages absorb the moisture from the flowers, aiding in the drying process. While this method is straightforward, it can take longer for the flowers to fully dry compared to using a flower press.
DIY flower press options
For those who enjoy a hands-on approach, DIY flower presses offer a creative and customizable option. DIY flower presses can be made using materials easily found at home or a local hardware store. Some common DIY press options include using wooden boards, bolts, and wingnuts, or even repurposing objects like old picture frames or pizza boxes. The advantage of DIY presses is the ability to customize the size, shape, and design to suit individual preferences.
Materials Needed to Create Your Flower Press
Types of wood to consider
When making a flower press, it’s important to select the right type of wood. Hardwood, such as oak or maple, is typically preferred due to its durability and resistance to warping or bowing over time. These types of wood also provide a sturdy surface for applying pressure. Softwoods, like pine, may be more prone to damage under pressure and may not provide the desired level of durability.
Selecting hinges and screws
Choosing the appropriate hinges and screws is essential for ensuring the proper functioning of your flower press. Brass or stainless steel hinges are recommended for their durability and resistance to rust. Screws should be long enough to securely hold the press together but not so long that they protrude out the other side of the wood. It’s crucial to carefully select the right size and type of screws to avoid any damage to the flowers during pressing.
Cardboard and paper recommendations
The choice of cardboard or paper to place between the flowers in a press is crucial for achieving optimal results. Acid-free cardboard or blotting paper is recommended to prevent any acidic residues from damaging the flowers. Acidic materials can cause discoloration or deterioration of the pressed flowers over time. Thick, absorbent paper, such as watercolor or parchment paper, is also suitable for generating the necessary pressure and aiding in the drying process.
Choosing the right glue and varnish
When assembling your flower press, choosing the right adhesive and varnish is important for long-lasting durability. Wood glue or carpenter’s glue is ideal for securely joining the wooden boards, providing a sturdy structure. It’s crucial to ensure that the glue is applied evenly and allowed sufficient time to dry before proceeding. A clear, water-resistant varnish can be applied to the exterior of the press to protect the wood from moisture and add an attractive finish.
Considering the Size of Your Flower Press
Different sizes and their benefits
Flower presses come in various sizes, each with its own benefits. Smaller presses are more portable and convenient for pressing individual flowers or small floral arrangements. They are easy to store and can be used for quick projects or on-the-go pressing. Larger presses, on the other hand, provide more surface area and capacity, allowing for pressing multiple flowers or larger blooms simultaneously. It’s important to consider your specific needs and intended use when selecting the size of your flower press.
What size is suitable for your needs
To determine the appropriate size for your flower press, consider the types of flowers you plan to press and the projects you envision creating with the pressed flowers. If you mainly work with small flowers or plan to create intricate designs, a smaller press may suffice. However, if you frequently work with larger blooms or wish to press multiple flowers at once, a larger press will be more suitable. It’s important to find a balance between size and functionality based on your unique requirements.
Balancing portability and capacity
Portability and capacity are essential factors to consider when choosing the size of your flower press. If you often travel or prefer to press flowers outdoors, a smaller press that is lightweight and compact would be more suitable. On the other hand, if you have ample space in your crafting area and plan to press a larger number of flowers or larger specimens, a larger press with more surface area and capacity would be advantageous. Assessing your specific needs and priorities will help you strike the right balance between portability and capacity.
Step-by-Step Guide to Making Your Flower Press
Measuring and cutting the wood
Start by measuring and marking the desired dimensions for your flower press on the wooden boards. Use a ruler or measuring tape to ensure accuracy. Once the measurements are marked, carefully cut the boards to size using a saw. It’s essential to have two identical pieces of wood to create a symmetrical and functional flower press.
Attaching the hinges
Decide on the placement of the hinges on one of the wooden boards. Mark the spots where the hinges will be attached, ensuring they are evenly spaced and aligned. Pre-drill small holes for the screws to prevent splitting of the wood. Attach the hinges using the appropriate screws, making sure they are tightly secured. Repeat the process on the other side of the press with the remaining hinges.
Assembling the layers
Once the hinges are securely attached, it’s time to assemble the layers of your flower press. Place a layer of cardboard or blotting paper on each wooden board, ensuring they are centered and aligned with the holes. Arrange the flowers or plant specimens between the layers, taking care not to overcrowd or overlap them. Add additional layers of cardboard or blotting paper on top of the flowers, alternating between the wooden boards.
Finishing touches
After assembling the layers, close the press by aligning the holes of the boards and inserting the screws through the hinges. Use a screwdriver to tighten the screws until the press is secure and the flowers are evenly sandwiched between the layers. Allow the flowers to dry in the press for the recommended time, ensuring they are not exposed to excessive moisture or humidity. Once the drying process is complete, carefully open the press and remove your beautifully pressed flowers.
Choosing the Right Flowers for Pressing
Best types of flowers for pressing
Not all flowers are suitable for pressing, as some varieties may not retain their color or shape after drying. Flowers with flat or semi-flat faces, such as daisies, pansies, and violets, are ideal for pressing as they press well and maintain their vibrant colors. Delicate flowers with intricate petals, such as roses or lilies, can also be successfully pressed, but extra care is needed during the pressing process to prevent damage. It’s best to experiment with different flowers to determine which ones yield the desired results.
When and how to pick flowers for pressing
To achieve the best results when pressing flowers, it’s important to pick them at the right stage of their bloom. Choose flowers that are fully open but not overly mature or on the verge of wilting. It’s recommended to pick flowers in the morning when they are at their freshest and have not been exposed to excessive heat or sunlight. Select flowers with vibrant colors and minimal blemishes or damage to ensure the pressed flowers retain their beauty.
Prepping flowers before pressing
Before placing flowers in the press, it’s crucial to prepare them properly to enhance the pressing and drying process. Remove any excess moisture from the flowers by gently patting them with a paper towel or allowing them to air dry for a short period. Trim the stems and remove any unnecessary foliage or thorns. It’s also helpful to arrange the flowers in a desired position or design before placing them in the press, as once they are pressed, their shape will be fixed.
How to Use Your Flower Press
Placement of flowers in press
To use your flower press effectively, determine the desired arrangement and placement of the flowers between the layers. Avoid overcrowding or overlapping the flowers, as this can result in uneven pressure and hinder the drying process. Arrange the flowers in a symmetrical or aesthetically appealing manner. Ensure that each flower is positioned in the same orientation on both sides of the press to maintain consistency.
Suggested press time for various flowers
Different flowers require varying amounts of time to be properly pressed and dried. Generally, smaller and delicate flowers may require less time, ranging from one to two weeks, while larger or thicker flowers may take three to four weeks. It’s important to periodically check the progress of the pressing process and adjust the duration based on the condition of the flowers. The flowers should be fully dried before they are removed from the press to avoid any damage or discoloration.
Care and maintenance of your flower press
To ensure the longevity of your flower press, it’s essential to properly maintain and care for it. Store the press in a cool, dry place when not in use to prevent moisture absorption or warping of the wooden boards. Clean the press after each use by removing any plant materials or debris and wiping it down with a soft cloth. Regularly inspect the hinges and screws, tightening them if necessary. A well-maintained flower press will continue to provide beautiful pressed flowers for years to come.
Troubleshooting Common Problems
Dealing with moisture issues
Moisture is one of the main culprits that can cause issues when pressing flowers. If you encounter moisture-related problems, such as mold or flowers not drying properly, check for any signs of excessive moisture in the press. Use fresh or dry layers of cardboard or blotting paper between the flowers to absorb the excess moisture. If mold appears, remove any affected flowers and ensure the press is thoroughly cleaned and dried before reuse.
Addressing flower discoloration
Flower discoloration can occur during the pressing process due to various factors such as improper drying or exposure to moisture. To minimize discoloration, ensure the flowers are fully dried before removing them from the press. Avoid pressing flowers that are past their prime or starting to wilt, as they may already have some discoloration. Additionally, using acid-free materials and storing the pressed flowers in a dark, dry place can help prevent further discoloration over time.
What to do if flowers stick to the press
In some cases, flowers may stick to the layers of the press, making it difficult to remove them without causing damage. To address this issue, gently loosen the flowers by carefully lifting the surrounding layers of cardboard or blotting paper. Use a toothpick or a small, soft brush to gently lift and separate any petals or parts of the flower that are sticking. Patience and a delicate touch are key to avoid tearing or breaking the pressed flowers.

Making Art with Pressed Flowers
Craft ideas for pressed flowers
Pressed flowers offer a world of possibilities when it comes to creating art and crafts. They can be used to make beautiful botanical prints, pressed flower collages, framed pressed flower arrangements, or bookmarks adorned with delicate petals. Create unique greeting cards by incorporating pressed flowers into your designs, or design one-of-a-kind jewelry using resin and pressed flowers. The versatility of pressed flowers allows for endless creativity and the opportunity to bring the beauty of nature into your artistic endeavors.
Tips for creating pressed flower art
When creating pressed flower art, there are a few tips to keep in mind to achieve the best results. Experiment with different arrangements and combinations of pressed flowers to create visually appealing compositions. Use a quality adhesive, such as glue specifically designed for crafting, to ensure the pressed flowers adhere securely to various surfaces. Consider incorporating other elements like leaves, ferns, or grasses for added texture and visual interest. Finally, protect your pressed flower art from direct sunlight and excessive humidity to maintain its color and prolong its lifespan.
Maintaining the color and integrity of pressed flowers
To maintain the color and integrity of pressed flowers, proper care is essential. Avoid displaying pressed flower art or crafts in direct sunlight, as prolonged exposure can cause fading or discoloration. If desired, use a spray sealant or fixative specifically designed for pressed flowers to provide additional protection against fading and moisture damage. Consider framing pressed flower art behind UV-protected glass or acrylic to further safeguard its color and delicate structure.
Safety Precautions When Making and Using a Flower Press
Handling tools correctly
When creating and using a flower press, it’s important to follow basic safety precautions to prevent accidents or injuries. Handle sharp tools such as saws and screwdrivers with care, keeping them away from children or inexperienced individuals. Use appropriate protective equipment, such as gloves or safety goggles, when necessary. Read and follow the manufacturer’s instructions for any tools or materials used during the creation of the press. Prioritize safety to ensure a smooth and enjoyable pressing experience.
Safe storage of your flower press
When storing your flower press, ensure it is kept in a safe and secure location out of the reach of children or pets. Store it in a dry area to prevent moisture damage or warping of the wooden boards. Avoid placing heavy objects on top of the press, as this can damage the structure or warp the wooden boards. Consider covering the press with a cloth or protective cover to keep it dust-free and protected from potential damage.
Dealing with potential mold and pests
Mold and pests can pose a risk to your flower press and the pressed flowers within it. To prevent mold growth, ensure the flowers are completely dry before placing them in the press. Regularly inspect the press for any signs of mold or pests and take appropriate actions to remedy the situation. If mold appears, remove any affected flowers and clean the press thoroughly with a mild cleaning solution. For persistent pest issues, consider using natural remedies or consult a professional for guidance.
By following these comprehensive steps, you will be well on your way to creating your own flower press and exploring the world of pressed flower art. Enjoy the process of preserving the ephemeral beauty of flowers and unleash your creativity through various projects and crafts. With practice and experimentation, you will discover new ways to use pressed flowers and add a touch of nature’s splendor to your life.


